


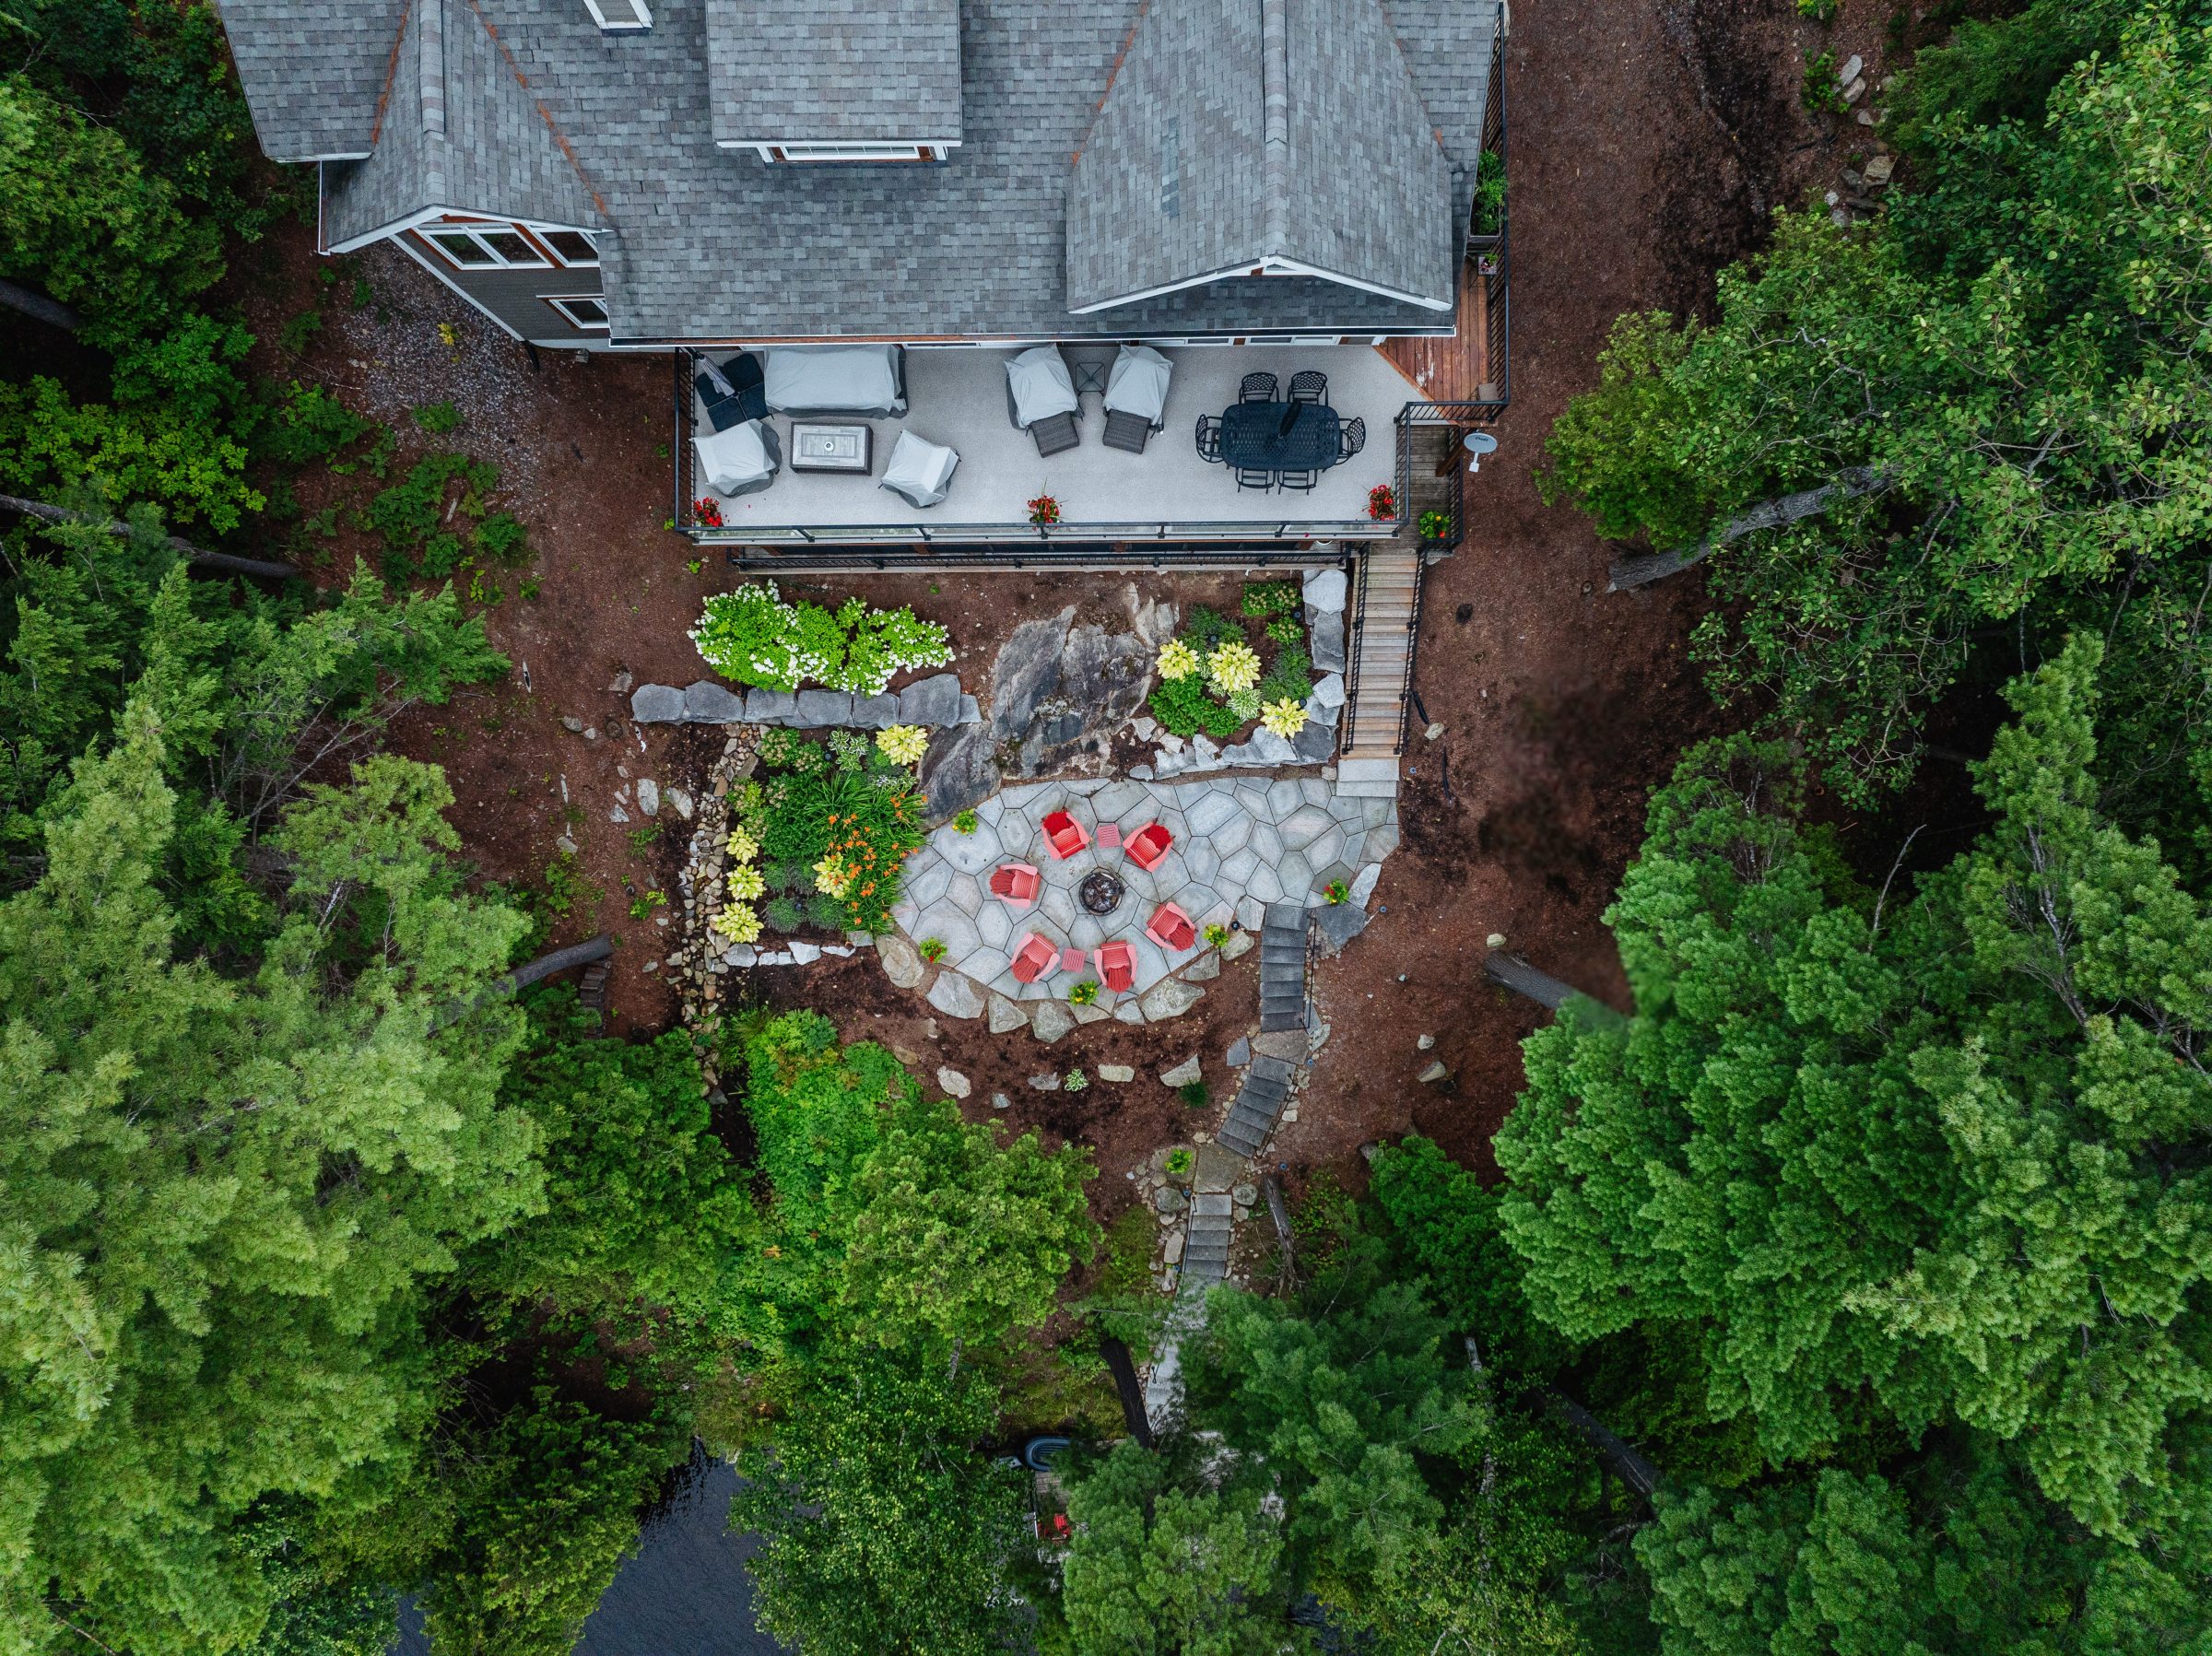
If you’ve searched how to build a patio or how to plan a patio on your Muskoka property, you already know it takes more upfront thinking than a typical Ontario backyard project. Canadian Shield bedrock, shoreline setback rules, and a construction season that really only runs May through October all shape what’s possible on your lot before a single stone gets laid. Good patio planning means working through six decisions before you ever book a contractor consultation, so that first meeting is productive instead of exploratory. Here’s what to think through first.
Step 1 — Walk the Site and Understand Your Terrain

Before anyone talks design, you need to understand what you’re actually working with. A site assessment tells you what’s possible; a design conversation without one is just guessing.
Walk the area you’re considering and look for grade and slope, any rock outcropping that would need to be removed or built around, tree root proximity, drainage patterns, and distance from the shoreline. Take photos from multiple angles, note where water pools or runs during rain, and mark which zones get sun versus shade through the day.
Many properties in Huntsville, Bracebridge, and Port Carling have Canadian Shield bedrock at or near the surface. A contractor working in Toronto can usually dig a base wherever they like. In Muskoka, the first question is often how deep the base can realistically go, and whether rock removal enters the picture at all. You can do this walk-through yourself, and it’s worth doing before your first call so the conversation starts from real information.
What to do if your property has exposed rock
You generally have three options: work around the rock and let it double as a design feature, cut it out (which adds real cost in equipment and sometimes permitting), or build a raised patio over it. Many of Muskoka’s best patios treat exposed granite as the feature rather than the obstacle. It’s a look that reads as belonging to the property rather than fighting it.
Step 2 — Identify Where the Patio Will Go (and Check What’s Allowed)

Where you want the patio and where it’s actually permitted aren’t always the same spot, especially on a waterfront patio for a muskoka lot. The District of Muskoka and individual townships (Huntsville, Bracebridge, Lake of Bays, Georgian Bay Township) each have shoreline development guidelines and setback requirements tied to the high-water mark, and those rules vary by township and lot designation. It’s worth reviewing the District of Muskoka’s planning resources and, if you’re in Huntsville specifically, the Township of Huntsville’s zoning bylaws, since neighbouring townships won’t necessarily apply the same standard.
The Ontario Building Code is a useful secondary reference for outdoor structure requirements generally.
Larger patios or certain shoreline zones may also require a permit, this is an area where guidance matters more than guesswork, and it’s something Mike’s helps clients navigate rather than something to figure out solo. Beyond the rules, think practically about orientation: sun exposure, prevailing wind, sightlines to the water, and how the space connects to your home’s interior.
Step 3 — Decide How You Will Use the Space

Before materials or layout, work through how you’ll actually use it. How many people do you typically host? Is this a morning-coffee space or an evening entertaining space? Do you want a fire feature? Will it hold dining furniture, lounge furniture, or both? Is an outdoor kitchen realistically in scope?
Use drives size. A quiet spot for two chairs and a coffee needs roughly 100–150 square feet; a patio built for eight people, dinner, and a fire pit needs 400 square feet or more, and often more once walkways and seating clearance are factored in. It’s a common miscalculation – a layout that looks generous in a showroom photo often feels tight once real furniture, foot traffic, and space to move around a fire pit are added in.
If your property is seasonal and sits empty over winter, factor that in early. Outdoor kitchens and more complex water features need a winterization plan, and that’s far easier to design in from the start than to retrofit later once the patio is already built and in use.
Step 4 — Set Your Budget Range Before Choosing Materials

Budget shapes every material and design decision that follows, so it’s worth setting a realistic range before you fall for a specific stone or layout. Muskoka’s terrain and remoteness typically push costs above Ontario averages, and site preparation (rock removal, grading) is one of the biggest variable costs in patio construction muskoka projects, often adding meaningful expense before construction even begins.
The main cost drivers are site complexity, base depth and preparation, material choice, overall size, site access (some cottage properties can’t accommodate standard equipment), and whether a permit is required. Our pricing calculator can give you a rough range to start from. If the full scope doesn’t fit one season’s budget, phasing is also an option. Mike’s can design the complete project in year one and build it out over two seasons.
Step 5 — Research Patio Stone Materials and Narrow Your Options
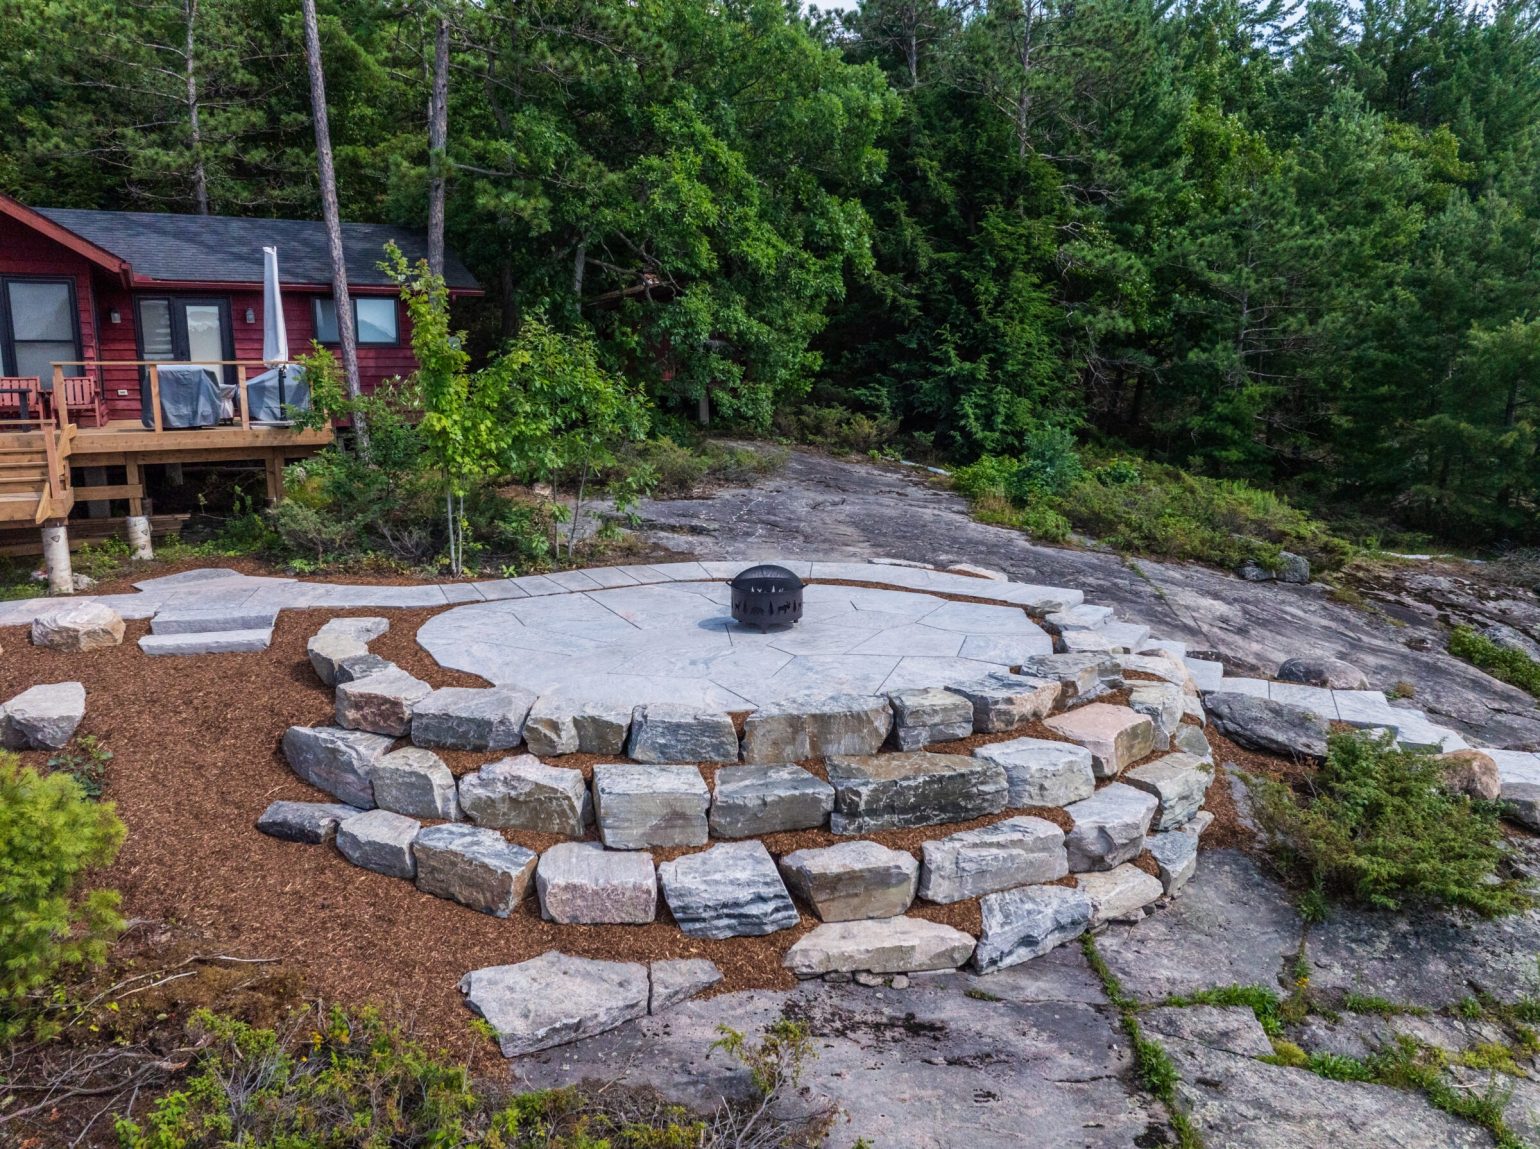
For a full materials breakdown, see our companion guide, 9 patio stone ideas for Muskoka cottages, or our complete patio design guide for Muskoka properties. In short, the decision usually comes down to natural stone, interlocking patio installation, or a mix of both and the right call depends on the terrain from Step 1, the use-case from Step 3, and the budget from Step 4.
Natural granite and Canadian Shield stone tend to be the most visually authentic choice for lakefront properties; it looks like it belongs to the landscape rather than sitting on top of it. Interlocking is more cost-efficient and easier to maintain, and most high-end patio stones muskoka projects end up combining the two. This guide won’t walk you through how to lay patio stones or how to install patio stones step by step, that’s your contractor’s job, and part of what you’re paying for, but understanding the material trade-offs now makes Step 6 far more productive. One detail that’s easy to overlook: not every paver on the market is rated for the freeze-thaw intensity Northern Ontario winters bring, and material quality matters more here than in milder climates.
Step 6 — Prepare for Your Contractor Consultation

Before your first meeting, put together site photos, a rough sketch of where you’re picturing the patio, your use-case answers from Step 3, a budget range, and any permit questions. A good consultation should include an actual site visit, not just a phone call, plus honest feedback on what’s realistic for your specific property and a written proposal with clear scope. That’s how Mike’s process starts, and it’s the same approach behind our patio installation work across Muskoka.
Finding the right Muskoka landscape contractor (or a Huntsville patio contractor, if that’s your area) comes down to how they handle this early planning stage. Look for someone who treats the patio design process as a genuine back-and-forth, not a quick quote over the phone.
On timeline: the Muskoka construction season runs roughly May through October, and the contractors worth hiring tend to book up early. Starting your patio planning in winter or early spring puts you in a much better position for the season you actually want.
Ready to move from planning to building? Mike’s Landscaping has guided Muskoka homeowners through every step of the patio process for over 25 years. Request a quote and let’s walk your site together.
When to Hire a Muskoka Patio Contractor vs. DIY

Some homeowners weigh doing this themselves, and it’s worth being direct rather than dismissive about it. DIY genuinely works for small, flat gravel pads or simple stepping-stone paths on level ground, especially in low-traffic areas away from the shoreline.
Professional installation is strongly recommended for anything larger than 150 square feet, any patio near the shoreline, any site with grade changes over 6 inches, any excavation deeper than 4-6 inches, or any project on or near Canadian Shield bedrock, which describes most Muskoka lots. The risk isn’t hypothetical: an inadequate base in this climate typically shows up as a shifted, cracked, or sunken patio within two or three winters, once freeze-thaw cycles have had a chance to work on it.
If your project fits any of that and most Muskoka patio projects do, a consultation with a local contractor is the logical next step. Read our complete patio design guide for Muskoka properties for design inspiration, or Request A Quote to get your project on the calendar.
Summary of How to Build a Patio
Planning a patio on a Muskoka property involves more than picking a stone pattern. From assessing Canadian Shield bedrock to navigating shoreline setback rules and the region’s short construction season, careful patio planning makes all the difference. This guide walks Muskoka homeowners through six essential steps before booking a contractor consultation, ensuring a smoother, better-prepared project from the start.
Tags: